
SELF TAPING 101.
- samthomas0
- Jan 29
- 9 min read
Whether we like it or not, self-taping has become the most popular way casting directors audition for upcoming roles.
Whilst self-taping is certainly not a new way of conducting auditions, it has started to overtake 'in the room' auditions, even for theatre roles.
The most important thing about self-taping is making sure you come across just as well as you would want to come across in an audition room. It is VITAL that your personality, creativity and best 'self' comes across in your tape.
With that in mind, here is a checklist of essential components, techniques and factors to really help your self-tapes go the distance and make a great impression on casting directors, directors, producers and even those financial backers in the suits.
FRAMING


The three examples above demonstrate good and bad framing choices. The first image is an example of good framing for a TV/ FILM self-tape. Typically with screen, you do not need to show too much of the torso, it is far more important to keep a focus on what the face is doing. Screen performances are all about the eyes That being said, if you look at the second image, you will notice how there is no torso being shown and the framing crops at the neck; this is not enough and makes the performance look far too boxed in.
The third image is a great example of ideal framing for a theatre self-tape. Theatre performances are inherently bigger than screen performances, therefore casting directors or directors will be looking to see more physicality and full body engagement in a tape.
As a general rule, the height of the camera should be at eye level, this is so the eyes are level with the centre of the image and therefore in full view. This can change, depending on the specific tape, but it's always best to follow this rule if not otherwise specified.
Another important rule of framing is where you actually place the camera in relation to where you are in the frame. If you are in the middle of the frame, then make sure the camera is central and abiding by the RULE OF THIRDS.
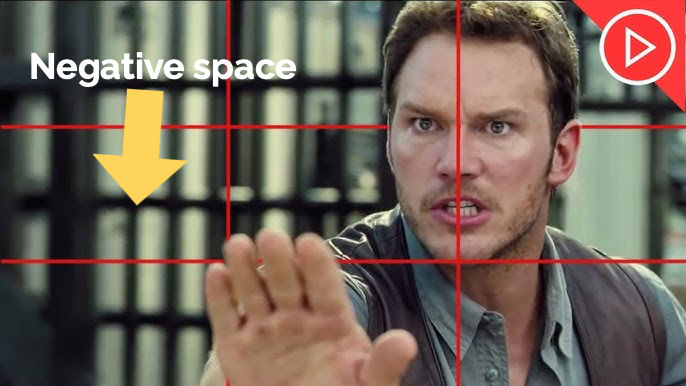
Notice how Chris Pratt's face is slightly to the left of the frame in the left-hand box, this is perfect for where his eyes are looking- he is clearly speaking to someone towards his right off-camera. Imagine if he were looking towards someone on his left, off-camera- it would look really strange.
It's good to leave some negative space on the side you are addressing, in this case, on his right, in order to allow for the audience to imagine the other person being just off camera.
HOT TIP: ALWAYS follow the specific instructions from the casting director before taping. Some CD's will ask for a specific framing style or camera position based on what you are auditioning for.
LIGHTING
Good lighting is a very simple, but effective way of making your tape look ten times more professional than a poorly lit tape. Take a look at the pictures below and decide for yourself which tape looks more professional and clear.


Hopefully you'll agree that the second picture (the glasses and white shirt) is much crisper and professional looking than the first picture. But why is that? Well, the second picture is an example of a properly lit tape. The light being used is a white soft-box light, which gives an image very soft, but fully covered lighting; highlighting all the various details within the image and allowing the quality of the image to shine through.
The image of the poorly lit self-tape just looks dead and much less interesting to look at. The eyes don't pop nearly as much, and the performance is nowhere near as alive.

The white soft-box light is an inexpensive way to enhance your tapes. You can pick one up from Amazon.co.uk for £25 (or you can spend a little more for something more substantial and advance), but even the most basic light is going to make a massive difference to your tapes!
SOUND
In many ways, sound is even more important than image. Have you ever watched a video with good strong visuals, but really poor audio where you can barely hear anything? Or there's a load of distortion and crackle? It's next to unforgivable.
Listen to the two video examples below to hear the difference between good and bad sound in self-tapes.
The first tape is an example of crisp, clear and clean audio- easy to understand, engaging and enhances the quality of the overall tape.
The second tape is an example of really poor, unclear, muffled audio- difficult to understand and therefore disengaging for the audience and frustrating to watch. Completely lets down the overall quality of the video and more importantly, the performance.
So, what's the fix? Well, you can invest in a Lavalier microphone- this is a mic that clips on to your clothing and can give you much cleaner and more directional sound. The downside of this can be the cost- if you want a really good lav mic, expect to spend a lot of money. You can get less expensive ones, but be aware that these might actually hinder you rather than help you.

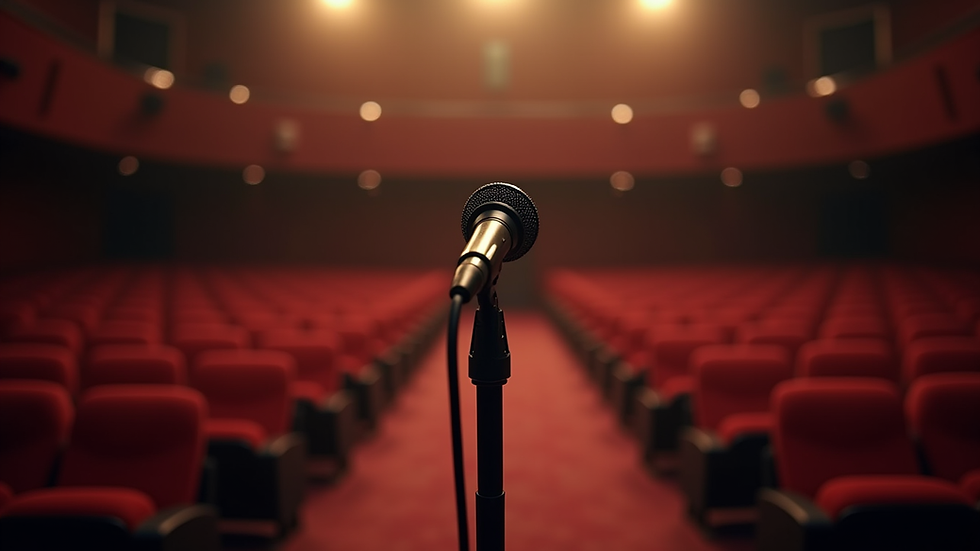
You could invest in a small directional shotgun microphone, like the one pictured below. Again, these can be quite expensive if you want a really good one, but it might be worth it if it's going to help your tape.

Finally, using a solid camera or phone. The new iPhones are quite literally capable of filming Hollywood movies these days- seriously, the new 28 Years Later film was made using the iPhone 15 (not even the latest model as of today!) The sound capture quality on iPhone is beyond good enough.
HOT TIP: Whatever microphone or camera you use, if you film in a noisy location, there is nothing you can do to improve the sound quality. Try to film your tape in really quiet environments to capture clean and crisp sound.
BACKGROUND, CLOTHING AND ACCESSORIES
It's important to point out here that this particular piece of advice can be very subject to change, dependant on what the casting director has asked for, but here is some helpful general advice for the generic self-tape.
The Background should be plain without anything that might distract the viewer. If you have a load of clutter or posters in the background, it is going to distract the viewer from your performance, no matter how hard they try to focus on you. It's not their fault, it's how the human mind works.
You don't have to use a white background, you can use blue or green or even black, just make sure the background is plain and doesn't distract.

The same goes for clothing, you should try to avoid wearing clothes that are too noisy in colour or overly patterned. If you have too much loudness in terms of colour, you are going to distract the viewer, the same with complex patterns- there's only so much the human brain can do at ignoring certain visuals. Also, certain colours and patterns do not look good on camera, it's just one of those things. See below...


Accessories are another one. Try to avoid loads of jewellry or piercings etc... Again, very distracting and could be completely against what your character would wear. Then again, maybe your character would wear jewellery and piercings, in which case, go for it; just still be aware that casting directors want to see YOU, not your personal fashion choices.
QUALITY SETTINGS AND COMPRESSION
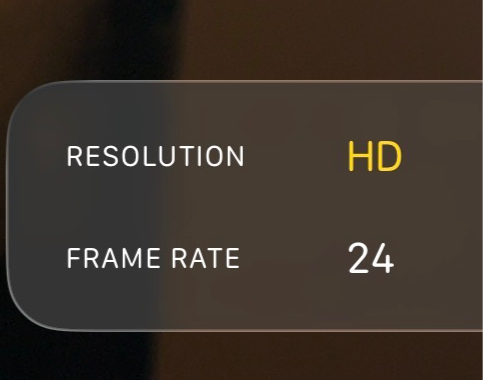
When it comes to the actual filming of your tape, it's important that you choose the corect settings. Most smart phones, including the latest iPhones, shoot 4K quality video now. Whilst this is incredibly impressive and looks great, it's not necessary for a self-tape. Why does this even matter though? Well, you need to bare in mind, when you send your tape to a casting director, the higher the quality the larger the fille and therefore the longer it takes to upload and send, and then longer it takes to download on the other end. Casting directors don't want to spend hours downloading tapes from actors, they want to spend the time watching the tapes. 1080HD quality is more than enough for a self-tape and will significantly reduce file size.
Further to this, you can use video compressor websites to further reduce the file size. Most Casting director's will give a specific file size guideline for their tape (for example, "No more than 200mb").
Here is a list of some great, FREE video compressor websites you can use...
HOT TIP: If you forget to change the settings on your phone from 4K to HD, don't worry! You can still compress the video to make the file size smaller- you might just have to compress it more than once to compensate.
CAMERA / TRI-POD
When it comes to what you use to shoot your tape, there is no hard and fast rule. You can use your smart phone, or you can use an Arri Alexa (I wouldn't if I were you- the file size, set up and editing process would be ridiculously long). The only thing to say is, make sure you shoot it on something that has at least 1080p HD filming capability, and make sure it is user friendly. The last thing you want is to be concerning yourself with is complicated equipment instead of focusing on your performance. Remember, you are not filming a movie, you are not trying to show off your cinematography skills here, you are presenting yourself as the best possible actor you are, in your best light (literally).
Make sure you get hold of a good tri-pod, or at the very least, have a set up which allows you to prop your camera up to make sure the image is even and consistent. Shaky cam and Dutch Angles won't work here.
EDITING
Again, this doesn't need to be and shouldn't be a complicated exercise. When it comes to editing the tape, keep it nice and simple; don't put any music or underscore with your tape- seriously, it won't help your tape, it's just another distraction for the people watching it. This is not the time to chuck a load of VFX or SFX in to your tape- save those skills for your next short film or student feature; keep it plain and simple.
Make sure you edit the video so the awkward fumbling whilst you set up the shot and get in to position, as well as when you've finished the scene and you break character to finally let out that sneeze you've been holding, is gone. No one needs to see that and it will make your tape look a lot less professional if you keep it in.
You can add basic title cards before your tape, something like this...

Something as simple as that is enough, and it only needs to be a couple of seconds long-the quicker you get in to the actual performance, the better.
If you have multiple scenes or takes, you can label each scene/ take with a similar title card before each one, just to make it clear which is which.
HOT TIP: Always pay attention to what the Casting director has asked for in terms of order of scenes, or whether they want the scenes stitched together. You may have to deliver what is known as an "IDENT" to the camera before the start of your tape. This is simply where you address the camera, as yourself, and say your name, agent. whether you have a full UK Passport and then you rotate to show your profile from each side and your hands. This is simply so the casting director can see you from every angle clearly- this is usually only for advert/ commercial castings.


PREPARATION/ PERFORMANCE
This is less a technical thing and more just some advice about prepping for a self-tape. When it comes to screen performances, casting directors are looking for the best possible take you have. If you happen to forget a line, or make something up during a take, don't think that take is un-useable- if that take happens to be your best one, then send it! It's far more important to send a great take where the lines are slightly wrong as opposed to a bad take where the lines are word perfect. The same goes for theatre, unless it's for a musical and you mess up lyrics... this is not really acceptable if you start making up lyrics or fumbling words for obvious reasons.
The most important thing to prepare for is What the charatcer wants, What is the obstacle to that want and who the charatcer is speaking to. If you can decipher these questions, you will be well on your way to delivering a well-rounded, truthful and character driven performance. Make sure you know where you are looking during the tape- don't let your eyes dart all over the screen, otherwise it will be hard to understand what you are trying to communicate. As a general rule, it's helpful to direct your eye line so they are just looking off camera, keeping them open and close to the lens without actually looking down the lens- this is far more engaging.

Hopefully that's given you some helpful advice and tips when it comes to filming your next tape!
Remember- keep it simple and keep it professional. No need to show off your filmmaking skills here, but equally, there's no need to shy away from simple, but effective details to really polish your tape and give yourself a great casting opportunity.


Comments